Showing posts with label sequencing. Show all posts

Friday, June 8, 2012

Class Schedule

A fantastic organizational tool that we've utilized all year has been our picture schedule. It hangs on the far left side of our whiteboard at the front of the room. I typed out the word for each subject/activity alongside a corresponding image (using a mixture of clipart, Boardmaker icons, and actual classroom photos, based on what I thought would resonate), then cut them into strips. I laminated each one and attached a magnet to the back. 


Sorry, I know these photos aren't the best quality!

At the start of the year, the pictures helped me explain what we were doing and assisted with transitions. For example, say I was teaching on my own and it was time for snack. Attempting to gather up 23 little ones that have no idea what you're saying feels like an impossible task! It was incredibly helpful to simply pull the "Canteen" strip off the board and walk around the room (while doing the Signed English motion for "eat" and showing them how to clean up). And of course, the children loved seeing themselves and their friends in some of the photos!

Later in the year, the schedule became much more about time and the sequence of events as the children's awareness of these grew. If one of the kids asked me if it was time to go home, I could say, "Soon --  here is Bus Time, but first we have Music and Wrap Up. So first we will go to Abla Geehan, then I will read you a story, and after that it will be time for the bus." I'd show them 1, 2, and 3 with my fingers as I explained. It's amazing to see children understand all of that, especially given what things were like in September! 

I could also connect the picture schedule with our nearby wall clock. Say a student wanted to go out to play, but we had 10 more minutes of Numeracy centers -- I could reference the schedule, point to the clock, and explain that when the big hand reached the 6, it'd be time to go outside. Seemingly without fail, the asker would nod his or her head and get back on task.

Finally, I personally loved our picture schedule for my own organizational sanity! Prepping it first thing each morning allowed me to think through the day ahead, and it was nice to have an at-a-glance way to see where we were/needed to be during the day.

Ordering Numbers

Before . . .

. . . meets After :)

Note: The girls in the background of the second photo are NOT injured or sleeping! A group of them were tracing each others' bodies with sidewalk chalk, an extension of an activity we did during our "All About Me" unit at the beginning of the year.

Sunday, May 27, 2012

More Recycling and Fishing Fun

We explored the concept of recycling in conjunction with our Magnets theme, and they actually complemented each other very well in many ways (just watch this video for proof).

During Numeracy one day, we had a (lighthearted!) can-stacking competition, which the children dedicated themselves to completely. It was a great way to practice counting, as well as comparison words like "tall" and "short".


Earlier in the week we'd gone fishing amidst the trash (including cans, paper, and plastic bottles) using a magnetic pole. We discussed how hard it was to find and catch fish with all the garbage in the way. Removing it from our pond was only the first step; the next day we sorted everything by type to practice proper recycling.

Our magnetic fishing game was a lot more fun without all that trash in the way!

As for the fish . . . they're simply made out of craft foam with paper clips attached. Each is marked with a different number of dot stickers, 1-10. After catching a fish, the children count the number of stickers, then match it to the correct numeral card.


I have several sets of numeral cards; this "counting" version allows the children to self-check when they're working independently.


I'll admit, it surprised me how excited the children were to engage with this activity on their own (and for quite an extended period of time), and it was excellent to watch several of them demonstrate mastery of the task. We've certainly come a long way since September!

Wednesday, May 23, 2012

Ordering Fish Integrated Activity

In addition to our large-scale bubble backdrop, we also made personal bubble paintings using the same method. The children dipped cardboard tubes in white paint, then stamped them on blue construction paper to make an "ocean":


They then ordered different colored fish by length (they glued them on their backgrounds and even drew eyes and mouths in many instances. But as usual, I have more photos of the process as opposed to the product!)

We did this as a Numeracy-meets-Art activity, in conjunction with Literacy, as it was inspired by our study of the book Blue Sea.


Blue Sea is yet another book the children want to read on repeat! They understand all the vocab and just love to participate in telling the story. It's a lot of fun to watch their facial expressions change these days as they become more and more wrapped up in read alouds :)

I also set aside an extra set of fish + background (made by a student helper) to use for retellings. I used the set first during whole group story time, and the children loved interacting with it on their own during centers.


Friday, May 18, 2012

Goldfish Cracker Numeracy

During our Sea Creatures focus, we did some counting using Goldfish Crackers, which I was surprised and fortunate to find in stock at Lulu's!

I laminated several counting mats for the children to use during small group time. (They were numbered one through six, though this could easily be extended. Not pictured are the mats I adapted by drawing on "counting dots" to assist the children that still have trouble recognizing all of the numerals.) The children simply counted out the proper quantity of goldfish to match the amount shown on each bowl. 


Another simple way to adapt this activity is to introduce a "control" (Montessori-style). Instead of simply setting out a whole bunch of crackers, you'd pre-count the exact number necessary to complete the task (in this case, 21 crackers). The children then have a way to self-check their results. 

We extended the activity by using some crackers for addition, too:


Using small-scale manipulatives in this way mirrored the activity we'd been doing in whole group. While most of our class is still building up the fine motor skills necessary to draw/write out an activity like this, quite a few are ready for the mental task itself. It could easily be completed using stickers and pre-made numerals for students to glue on in place of writing.

Here's what the process looked like during whole group (once again, similar to what we did here with eggs):


Writing out our carpet during whole group . . .

. . . and showing our work with pictures the next day (some of the children completed did this independently during small group as an extension).


Friday, April 20, 2012

Color Word Step Books

As the children's understanding of English has grown, their enthusiasm for reading and books has exploded! Inspired by this activity, I decided to have them make their own books (they loved it!), adapted to suit the needs and abilities of our class.

Here was our process:


1| Gather colorful rectangles in various sizes.


2| Layer them by size and staple together.


3| Match and glue the corresponding color word to each page.


4| Display as a beautiful banner for all to enjoy!

This past week we moved on to accordion books. The children just love the process of making something beautiful, familiar, and functional to call their very own. I do, too :)

Monday, April 9, 2012

Story of the Week: Press Here

Yesterday we kicked off our new unit with the book Press Here by Herve' Tullet. Tullet's books are bright, playful, and creative, which makes them some of my favorite to use in the preschool classroom.


Press Here is full of directional language and really plays on children's curiosity as they watch the magic unfold on each page. Here's an example from the first few pages of the book:


Press the dot on the first page, and two appear on the next! Children are excited and amazed by what they can "cause" the book to do as they read. (And believe me, it only gets better!)

Press Here also incorporates red, yellow, and blue (the primary colors), along with black and white, which made it the perfect tie-in for our colors/color mixing theme. After we finished reading, we made tissue paper dot collages using different sized circles.


We used paintbrushes to cover a sheet of white tagboard with a mixture of glue and water, then (gently) placed the tissue paper circles onto the sticky surface.

This was a process-based activity, meaning there was no specific end-goal in mind or "right way" to complete the project. The idea was to allow children to explore the materials with minimal teacher input as to what they were "supposed" to make. A few learned very quickly that rubbing the tissue paper would cause it to tear, and that too much glue would cause wrinkles. These kinds of discoveries are so much more meaningful when children figure them out for themselves, in their own time.

Pulling individual circles from a stack was also great for developing fine motor skills.


Our collages are dry but still need to be hung; we'll update you on the results once that's done. Have a great night!


Monday, March 19, 2012

Patterns, Sets, and Addition: It's All Connected in 1-4

These past few weeks in Numeracy we've been working on combining equal sets (in other words, simple addition, as in: 2 + 2 = 4). But before we get to that, I'd like to show you some of the "building blocks" that made these lessons possible.

Shortly after we returned from winter break, we had our first experience with sorting objects into equal groups, or matching sets. We'd talked about items that come in "pairs," like socks, mittens, even our eyes and ears. Later, the children worked with partners (or, rather "pairs" :) ) to sort unifix cubes into equal groups. We drew lines down the center of small whiteboards to use as a sorting mat.

Each pair received two different colors, presented in one large group. While some ended up sorting their cubes by color, not everyone did, which was absolutely fine, as the goal was simply to make two equal groups of cubes. Classifying by color was an added bonus, and it helped with the next portion of our activity:


Making patterns! The children continued to work in pairs, and there was some great discussion going on as they worked out what, exactly, was the right way to do this. (I'll point out that we'd been working on AB patterns daily as part of our Numeracy circle time, as well as in various contextual, play-based ways.)

Later we used laminated sorting mats and plastic animal manipulatives to continue our work with equal sets. I showed the children how to check their work by drawing lines from the animals in the first column to those in the second, as Shadha demonstrates here:


It was great to see these types of sorting activities pop up during independent play! Here, Hamdan has resourcefully recreated the sorting mat and used his favorite toys (the sought after plastic jungle animals) to make equal sets. Great work!


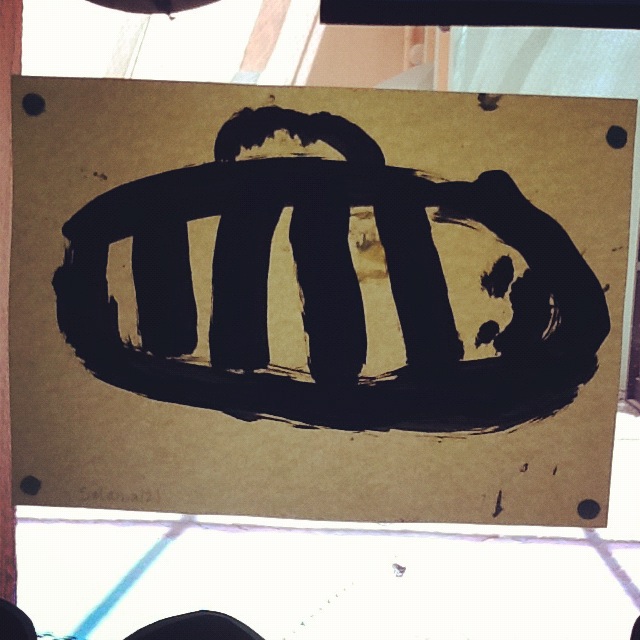
Our exploration of both patterns and equal sets continued as we began our Minibeasts unit: We painted striped patterns on bees . . .

by Salama


by Majed (top) and Hajer (bottom)

. . . and we made equal sets on the wings of ladybugs (or "ladybirds," going with the British form our school uses). The project you see a glimpse of below is a result of the children's independent work.


We began by drawing matched sets on the whiteboard -- so, if I put one spot on the right wing of a ladybird, a child volunteer would draw one on the left. If there were two on the right, there'd be two on the left, and so forth. We then counted the total number of spots on each ladybird (a bridge into, you guessed it, addition, or combining sets.) This presented a great opportunity to practice counting by 2's, so we made up a little chant:"2! 4! 6! 8! Who do we appreciate? Ladybirds, ladybirds, laaaaadddy BIRDS!" Throw in a few dance moves, and the children could count by 2's all day!

Following minibeasts, our topic was farm animals. Since we were also learning the letter "Ee" in phonics, counting and combining eggs was an excellent tie-in. It also gave us a chance to put our lovely nests to good use!

I started by setting out two nests on the carpet, each with an equal number of eggs (1, 2, or 3) inside. I told the children these were the eggs my chickens had laid and had them count the number in each nest, which was then written on the board. Now our job was to collect the eggs from both nests and put them in a basket to take home for supper.


After gathering all the eggs, we counted the total from our basket. Some children took the eggs one by one out of the basket as they counted . . .


. . . while others elected to dump all of them out and the systematically order and count them. Either way was, of course, absolutely fine!


You could almost see their eyes flash when they realized that if there were two eggs in each nest to start, there'd be four eggs in the basket.

Midway through the activity, one little boy was staring down at his hands, then suddenly gasped and turned to face me: "Ms. Emy! Ms. Emy! Five [showing me his left hand], five [showing me his right hand], TEN! [putting both hands up together]." How fantastic it is to see a child work something like this out on his own! (I mean, talk about extending patterns!)

Oh, and a side note: I made an equal number of brown and white eggs (using laminated paper, as plastic eggs aren't available here), which could then be used for additional sorting and patterning activities (i.e., sorting by color, making AB patterns). All in all, very integrated, and very useful! Some of the best maths we've done all year :)