Showing posts with label play-based. Show all posts

Friday, June 8, 2012

Ordering Numbers

Before . . .

. . . meets After :)

Note: The girls in the background of the second photo are NOT injured or sleeping! A group of them were tracing each others' bodies with sidewalk chalk, an extension of an activity we did during our "All About Me" unit at the beginning of the year.

Friday, June 1, 2012

Magnetic Tube Marble Racing

I put this activity together as part of our Magnets unit, and it has remained a standby center in all the weeks since. (Perfect for the whole "motion" aspect of Transportation! The idea came from Teach Preschool.)


The children helped paint a bunch of cardboard tubes one day. Once dry, I wrapped each tube in contact paper for durability and attached two magnets (found at Daiso) using hot glue. That's it - stack the tubes (we used our magnetic whiteboard), add a few marbles, and see what happens!

The children love assembling the tubes in different ways, seeing how tall they can make their marble runs! The boys in the above photos were figuring out how big a gap they could leave between tubes before the marbles would escape. They also found some plastic containers to use for catching (or trying to catch!) their marbles as they came out.

Simple, inventive, and fun.

Saturday, April 28, 2012

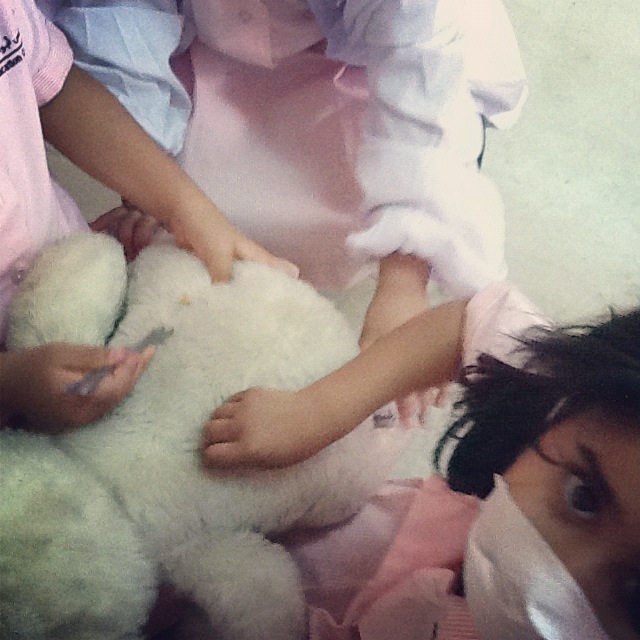
Bear Surgery

There was an emergency play dough removal that took place in our classroom the other day. . .


I'm sure the bear's the better for it :)

It amazes me what children come up with. A lab coat from the science center (must've had those masks still in the pockets), a wrench from the magnet station, and a teddy bear from the reading corner turned into something excellent.

I live for the brilliant, unexpected moments like these. Children are so incredible. What an honor to spend my days with these creative little humans.

Wednesday, April 18, 2012

Color Party

For some reason, last Thursday the children became convinced that we were having a party. Not sure how or where the rumor started, except for that it was a non-uniform day. Before simply telling them "No," that in fact there was no party planned, Abla Salwa turned to Mrs. Emy and said two of the best words on the planet:

Why not?

So we spent the last 30 minutes of the day having a spontaneous Color Party!

We blew up balloons and put on some dance-worthy music (the children LOVE this song!) . . .

. . . and Abla Salwa painted faces . . .

. . . while Mrs. Emy taught about the static electricity that results from rubbing a balloon on your head.

The balloons act like magnets!

 Our party was both a learning experience and a great time.

Such a fun way to end our color theme and welcome the weekend.

Thank you for the idea, children!

Monday, April 9, 2012

Thought of the Day


Image from melissasweet.net

“Children need the freedom and time to play.  Play is not a luxury.  Play is a necessity." 

Kay Redfield Jamison

Sunday, April 8, 2012

Our New Light Box

Ever since seeing DIY light boxes pop up on various teacher blogs, we've wanted one for our classroom. Over spring break, Mrs. Emy finally managed to make one. Here's how she did it.


You will need:

-a large, low plastic tub
-mylar (or similar material) to line the tub
-freezer or baking paper 
-double-stick tape, glue, or another adhesive
-scissors
-battery-operated lights, plus batteries to go in them

Purchasing information: The plastic tub here is from IKEA. I found a large mylar-coated foam lawn mat at Daiso, though the reflective shields for car windows (available at Lulu's or Carrefour) would work, too. The battery-operated push lights are also from Daiso.

You don't need to be super precise. The main thing is to make sure there are no gaps along the bottom or sides so that the light won't escape. (I cut a large rectangle for the bottom, then cut separate panels with plenty of overlap for the sides.) Attach with double-stick tape as you go.

Here's what my tub looks like fully-lined with the mylar. As you can see, no perfectionism present :) I tucked the overhang from my side panels under the lip of the bin and used more double-stick tape to hold it in place.
Place your push lights inside the lined tub.

Cut a piece of baking or freezer paper to cover the top of your tub. This will help mute and disperse the light. Again, it needn't be precise.

Push your lamps on when you're ready to use the light box. Obviously, you'll need to move the paper for this step :) Place it back on, secure the lid, and you're almost done!

This, of course, is optional, but salt writing is a really fun way to explore the light box. Since it's also the first activity I wanted to try with the kids, I decided to test it out at home.

I brought the completed light box to school today as a sort of "Welcome Back" gift for the children. I'm happy to report that they loved it!

I mean, look at that smile!

Trails in the salt

Someone discovered the colored plexiglass viewers I'd placed in our new "Science Lab" role play corner, adding a whole new element of creative play.


I will never grow tired of little hands at work. 

This was an easy and inexpensive enough project that we're thinking of making a few more boxes. It would also be a great item to have at home to encourage creative, open-ended play.

--

PARENT CORNER

Why salt writing?

Salt writing is a great sensory activity for young children. Pre-schoolers and toddlers especially learn through the use of their five senses, and salt-writing on the light box stimulates little eyes, hands, and minds. Using fingers to draw helps prepare hands for writing and allows children to practice making letters and marks in a pressure-free way. Writing with a finger is generally less frustrating to a child that may not yet be comfortable holding a crayon, pencil, or other writing utensil.

If you're interested in learning more about sensory play, these articles are a good place to start:

"A Handful of Fun" by Amanda Morgan at NotJustCute

"Sensory Play. . ." by Emily Harmon


Monday, March 19, 2012

Patterns, Sets, and Addition: It's All Connected in 1-4

These past few weeks in Numeracy we've been working on combining equal sets (in other words, simple addition, as in: 2 + 2 = 4). But before we get to that, I'd like to show you some of the "building blocks" that made these lessons possible.

Shortly after we returned from winter break, we had our first experience with sorting objects into equal groups, or matching sets. We'd talked about items that come in "pairs," like socks, mittens, even our eyes and ears. Later, the children worked with partners (or, rather "pairs" :) ) to sort unifix cubes into equal groups. We drew lines down the center of small whiteboards to use as a sorting mat.

Each pair received two different colors, presented in one large group. While some ended up sorting their cubes by color, not everyone did, which was absolutely fine, as the goal was simply to make two equal groups of cubes. Classifying by color was an added bonus, and it helped with the next portion of our activity:


Making patterns! The children continued to work in pairs, and there was some great discussion going on as they worked out what, exactly, was the right way to do this. (I'll point out that we'd been working on AB patterns daily as part of our Numeracy circle time, as well as in various contextual, play-based ways.)

Later we used laminated sorting mats and plastic animal manipulatives to continue our work with equal sets. I showed the children how to check their work by drawing lines from the animals in the first column to those in the second, as Shadha demonstrates here:


It was great to see these types of sorting activities pop up during independent play! Here, Hamdan has resourcefully recreated the sorting mat and used his favorite toys (the sought after plastic jungle animals) to make equal sets. Great work!


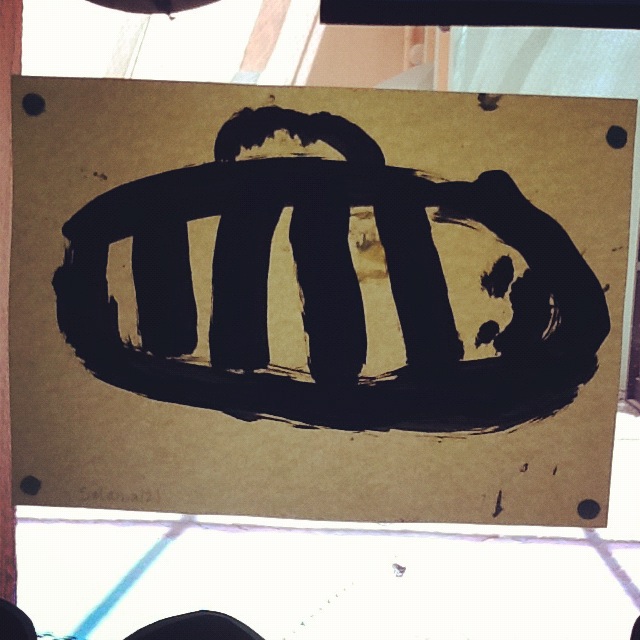
Our exploration of both patterns and equal sets continued as we began our Minibeasts unit: We painted striped patterns on bees . . .

by Salama


by Majed (top) and Hajer (bottom)

. . . and we made equal sets on the wings of ladybugs (or "ladybirds," going with the British form our school uses). The project you see a glimpse of below is a result of the children's independent work.


We began by drawing matched sets on the whiteboard -- so, if I put one spot on the right wing of a ladybird, a child volunteer would draw one on the left. If there were two on the right, there'd be two on the left, and so forth. We then counted the total number of spots on each ladybird (a bridge into, you guessed it, addition, or combining sets.) This presented a great opportunity to practice counting by 2's, so we made up a little chant:"2! 4! 6! 8! Who do we appreciate? Ladybirds, ladybirds, laaaaadddy BIRDS!" Throw in a few dance moves, and the children could count by 2's all day!

Following minibeasts, our topic was farm animals. Since we were also learning the letter "Ee" in phonics, counting and combining eggs was an excellent tie-in. It also gave us a chance to put our lovely nests to good use!

I started by setting out two nests on the carpet, each with an equal number of eggs (1, 2, or 3) inside. I told the children these were the eggs my chickens had laid and had them count the number in each nest, which was then written on the board. Now our job was to collect the eggs from both nests and put them in a basket to take home for supper.


After gathering all the eggs, we counted the total from our basket. Some children took the eggs one by one out of the basket as they counted . . .


. . . while others elected to dump all of them out and the systematically order and count them. Either way was, of course, absolutely fine!


You could almost see their eyes flash when they realized that if there were two eggs in each nest to start, there'd be four eggs in the basket.

Midway through the activity, one little boy was staring down at his hands, then suddenly gasped and turned to face me: "Ms. Emy! Ms. Emy! Five [showing me his left hand], five [showing me his right hand], TEN! [putting both hands up together]." How fantastic it is to see a child work something like this out on his own! (I mean, talk about extending patterns!)

Oh, and a side note: I made an equal number of brown and white eggs (using laminated paper, as plastic eggs aren't available here), which could then be used for additional sorting and patterning activities (i.e., sorting by color, making AB patterns). All in all, very integrated, and very useful! Some of the best maths we've done all year :)