Saturday, June 16, 2012

Reading Fair and End-of-Year Party

A few (OK, well maybe more than that!) photos from our last day of school. It was fun celebrating but so hard to say goodbye!

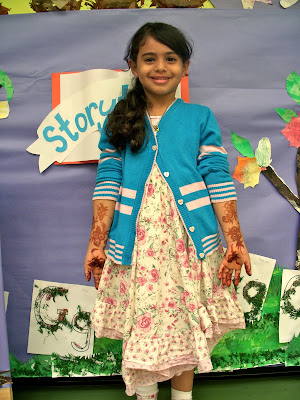
Pretty party dresses

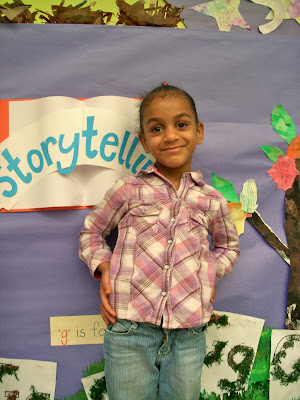
Waiting for the Reading Fair to begin. We were the "Storytelling" area. The kids helped make the entire background! After the festivities I took some individual shots of the kids posing in front of their hard work . . . 


And then they insisted on taking one of me :)


Unfortunately not everyone was in attendance, 
so a few faces are missing.
We still had a great time at our party!


I was too busy serving cake to take many pictures! 
I also let the kids take turns with my camera for a while. 
Here are a few of those shots:


I'd say they did a great job! Whenever I take photos throughout the year, I make a point of letting the children try out the camera, too (anyone who wants a turn can have one), so I guess you could still consider this "Review and Assessment" ;)


And a quick note . . . Families are welcome to keep in touch. Email me at emy.krauspe (at) gmail.com. I'd love to hear how everyone is doing! All the best, and have a great summer -- Mrs. Emy

Friday, June 8, 2012

Class Schedule

A fantastic organizational tool that we've utilized all year has been our picture schedule. It hangs on the far left side of our whiteboard at the front of the room. I typed out the word for each subject/activity alongside a corresponding image (using a mixture of clipart, Boardmaker icons, and actual classroom photos, based on what I thought would resonate), then cut them into strips. I laminated each one and attached a magnet to the back. 


Sorry, I know these photos aren't the best quality!

At the start of the year, the pictures helped me explain what we were doing and assisted with transitions. For example, say I was teaching on my own and it was time for snack. Attempting to gather up 23 little ones that have no idea what you're saying feels like an impossible task! It was incredibly helpful to simply pull the "Canteen" strip off the board and walk around the room (while doing the Signed English motion for "eat" and showing them how to clean up). And of course, the children loved seeing themselves and their friends in some of the photos!

Later in the year, the schedule became much more about time and the sequence of events as the children's awareness of these grew. If one of the kids asked me if it was time to go home, I could say, "Soon --  here is Bus Time, but first we have Music and Wrap Up. So first we will go to Abla Geehan, then I will read you a story, and after that it will be time for the bus." I'd show them 1, 2, and 3 with my fingers as I explained. It's amazing to see children understand all of that, especially given what things were like in September! 

I could also connect the picture schedule with our nearby wall clock. Say a student wanted to go out to play, but we had 10 more minutes of Numeracy centers -- I could reference the schedule, point to the clock, and explain that when the big hand reached the 6, it'd be time to go outside. Seemingly without fail, the asker would nod his or her head and get back on task.

Finally, I personally loved our picture schedule for my own organizational sanity! Prepping it first thing each morning allowed me to think through the day ahead, and it was nice to have an at-a-glance way to see where we were/needed to be during the day.

Ordering Numbers

Before . . .

. . . meets After :)

Note: The girls in the background of the second photo are NOT injured or sleeping! A group of them were tracing each others' bodies with sidewalk chalk, an extension of an activity we did during our "All About Me" unit at the beginning of the year.

Making Shapes in 1-4

Rectangles, triangles, and diamonds (oh my)!

Here are just a few of the ways we explored 2D shapes throughout the year. Enjoy!


Build-a-shape 

Find-a-shape

Make-a-shape (these became rays on a giant co-created sun)


Combine-a-shape (to make a new shape!)

Jump-a-shape (we did "T-Triangle" jumping jacks: Stand with feet together and arms out to make a "T," then jump your feet apart and put your arms down to form the triangle. Great way to incorporate movement throughout the day!)


Thursday, June 7, 2012

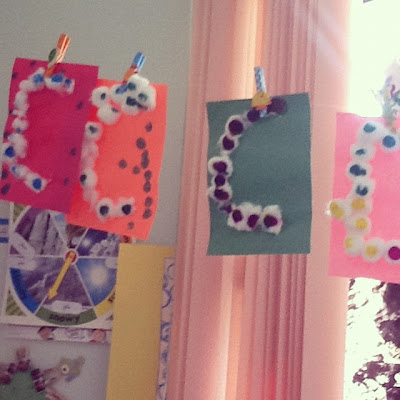
"C" is for "Colorful Cotton"

First . . . the children used a paintbrush and white glue to make a large "C" on a half-sheet of construction paper, then tore small pieces of cotton batting and attached them to the glue. (Tearing batting, as opposed to using cotton balls, was just an extra way to work on those ever-important fine-motor skills.)


Next . . . they used dot markers to add a little more color to their letters.


Finally . . . we strung them on our clothesline for a fun and bright classroom display :)


Year in Review: Let's Backtrack

It's been crazy looking back over all the photos from this year (and I definitely took A LOT . . . Still, it never feels like enough!). Since this blog was only started in February, there are a wealth of topics, activities, and accomplishments I never covered online.

Now that the school year is winding down, I'm planning to take some time to reflect and share on the incredible year we've had in 1-4. I hope you'll join me!

PS - You may have already noticed a new tab at the top of the page: Alphabet Projects includes links to letter crafts, as well as info about how we teach phonics at Al Suroor. 

Thought of the Day (and a Reminder!)


Image source

Have a great weekend! 

And don't forget . . . Next Tuesday (12.6) will be our end-of-year party in KG1. We're looking forward to celebrating with all the children - it's been a WONDERFUL year!

Friday, June 1, 2012

Magnetic Tube Marble Racing

I put this activity together as part of our Magnets unit, and it has remained a standby center in all the weeks since. (Perfect for the whole "motion" aspect of Transportation! The idea came from Teach Preschool.)


The children helped paint a bunch of cardboard tubes one day. Once dry, I wrapped each tube in contact paper for durability and attached two magnets (found at Daiso) using hot glue. That's it - stack the tubes (we used our magnetic whiteboard), add a few marbles, and see what happens!

The children love assembling the tubes in different ways, seeing how tall they can make their marble runs! The boys in the above photos were figuring out how big a gap they could leave between tubes before the marbles would escape. They also found some plastic containers to use for catching (or trying to catch!) their marbles as they came out.

Simple, inventive, and fun.