Saturday, April 28, 2012

Bear Surgery

There was an emergency play dough removal that took place in our classroom the other day. . .


I'm sure the bear's the better for it :)

It amazes me what children come up with. A lab coat from the science center (must've had those masks still in the pockets), a wrench from the magnet station, and a teddy bear from the reading corner turned into something excellent.

I live for the brilliant, unexpected moments like these. Children are so incredible. What an honor to spend my days with these creative little humans.

Making Paper

We did this activity as part of our study on solids and liquids. It was also a great tie-in with our recycling theme the following week. I try to consciously incorporate "bridges" most weeks -- activities that suit our current focus but also link to whatever we're planning to cover the following week. It gives the children an additional reference point to help them connect with new learning.


After morning circle, we spent some time tearing old paper scraps (more leftovers from this project) into very tiny pieces and left them to soak in a tub of water.


A few hours later, the paper had absorbed a decent amount of water (and those big pieces in the photo above had been re-shredded!). I used an immersion blender to pulverize the wet scraps a little at a time. The children thought it looked like ice cream! (But we all agreed it was probably best not to take a taste.)

Unfortunately, there are no photos of the blending step, as I was teaching on my own this particular day. However, the fact that we managed to finish this project, just one teacher and 22 little ones, tells you how fun and easy it is!


Finally, we spread our paper mush out on some towels and patted it out like a pizza crust. We also pressed dish towels on top to absorb the excess water. Once our paper "dough" was nice and flat, we placed another thick towel on top, as well as some heavy bins. Two days later, voila -- we had paper! Not sure what we'll use it for yet, but I'll be sure to share once we figure it out!


Monday, April 23, 2012

Recycling in 1-4

In honor of Earth Day, we've been learning how to recycle. Yesterday we practiced sorting materials into plastic, metal, and paper. We also cleaned out our messy (pretend) fish pond and talked about how trash can hurt the fish. That's one reason why it's important to throw our trash in the waste bin, instead of on the floor or ground. Some trash can even be used again to make new things, or recycled

School-Home Connection: Recycling
We'll be watching the video below at school soon, but feel free to watch and talk about it at home, too!


Story of the Week: Stars

We spent last week exploring solids and liquids. Towards the end of the week, Salwa and I co-read the book Stars by Mary Lyn Ray, illustrated by Marla Frazee.

Because this book is a bit longer and requires some deeper thinking on the part of the children, it was easier for them to engage when listening in both languages. I'd start by reading a page in English, then Salwa would translate and clarify.

We found Stars to be a very soothing book; our class was drawn in slowly, calmly, one page at a time.


After reading we posed a question to the children: What is a star?

The children knew stars were neither solid nor liquid, and it was interesting to watch them contemplate the possible answers to the question. We touched briefly on the idea of gas (which we explored again the next day . . . but more on that later!). The idea wasn't to reach a concrete definition or give them any kind of direct explanation -- we just wanted to get them thinking and hopefully asking more questions.

As a follow up to the book and discussion, we explored a new-to-us process: bubble painting! 


We mixed dish soap, paint, and water in a small container, then used a straw to make colorful bubbles.


After giving the children plenty of time to explore the bubble-making process, we gave them star cutouts to make prints with the bubbles:


It was a great way link what we already knew about liquids with a new concept (our breath as the gas that makes the bubbles), and in the context of a beautiful story and project.

Yet another one we just can't wait to display!


Friday, April 20, 2012

Press Here Display

Below, some photos of our (beautiful!) completed Press Here collages, now on display outside our classroom.


Color Word Step Books

As the children's understanding of English has grown, their enthusiasm for reading and books has exploded! Inspired by this activity, I decided to have them make their own books (they loved it!), adapted to suit the needs and abilities of our class.

Here was our process:


1| Gather colorful rectangles in various sizes.


2| Layer them by size and staple together.


3| Match and glue the corresponding color word to each page.


4| Display as a beautiful banner for all to enjoy!

This past week we moved on to accordion books. The children just love the process of making something beautiful, familiar, and functional to call their very own. I do, too :)

Sorting Smarties

As part of our exploration of colors and color mixing last week, we worked on sorting Smarties in Numeracy. Because this activity encompassed a range of goals (sorting by color/matching, counting, recording and analyzing, reading), I worked with the children in small groups over the course of the week. This allowed for plenty of one-on-one time, and it gave me an opportunity to really see where each child was at.

I introduced the activity to the whole group and explained that we'd be sorting the candy by color, demonstrating this process. However, when working with the children in small groups, I didn't give them pointers or reminders right away. I simply handed them the materials (a counting grid and small tube of Smarties) to see what they would do. I wanted to know if they'd wait for instruction or jump in, if they could open the candy container by themselves, and then how they'd go about getting the candy out (which, I learned, can be a bit tricky!). Something as simple as this is great for developing and assessing children's problem solving skills.

The next step was to sort the candy by color. Some children simply placed the candy in a completely random way all over the grid. I let them go about their business for a bit, before clarifying that we were sorting by color and showing them how to compare a piece from the pile to a color already on the grid, ensuring that each row is a different color.


Some children worked horizontally, making equal rows to start.


Many understood right away what was expected and got to work.
I love watching the systems different children have -- how organized they are, what methods they employ, etc. It's just fascinating to me.


Eventually everyone successfully completed the sort. No one had any trouble with the 1:1 correspondence aspect (one candy piece per box).


After sorting their Smarties, the children counted each color, and I recorded their results. (Most of the children recognize numerals up to ten, but no one is really writing them yet.) In this way, the children were able to observe the written formation of different numerals as well as an important function of writing (to record and communicate). We also talked about which row had the most and which had the least


After counting, recording, and analyzing the results, the children read each sentence back with the help of the teacher. (Quite a few were able to recognize "I have" after the first few sentences and read the remaining ones independently.) This was a great way to practice sight words and color recognition. Most of the children were extremely focused on the reading process, and they seemed proud to be doing something so grown up.

And then, of course, there was the best part: Eating our Smarties!

Every child enthusiastically participated in this activity -- all aspects of it. Honestly, they seemed to enjoy the sorting, counting, and reading without giving a whole lot of thought to the eating part! I loved that I could observe a range of skills and help the children practice others, without a lot of stuff or fuss.

Wednesday, April 18, 2012

Color Party

For some reason, last Thursday the children became convinced that we were having a party. Not sure how or where the rumor started, except for that it was a non-uniform day. Before simply telling them "No," that in fact there was no party planned, Abla Salwa turned to Mrs. Emy and said two of the best words on the planet:

Why not?

So we spent the last 30 minutes of the day having a spontaneous Color Party!

We blew up balloons and put on some dance-worthy music (the children LOVE this song!) . . .

. . . and Abla Salwa painted faces . . .

. . . while Mrs. Emy taught about the static electricity that results from rubbing a balloon on your head.

The balloons act like magnets!

 Our party was both a learning experience and a great time.

Such a fun way to end our color theme and welcome the weekend.

Thank you for the idea, children!

Monday, April 16, 2012

Everyday Discoveries: Words and Letters

The children are becoming more aware of words and letters in their surroundings with each passing day . . .


It's such a privilege to witness and guide them in their discoveries. Their growth and capacity for learning never cease to amaze.

(Can you tell it was Purple Day when these photos were taken? :) )

Monday, April 9, 2012

Story of the Week: Press Here

Yesterday we kicked off our new unit with the book Press Here by Herve' Tullet. Tullet's books are bright, playful, and creative, which makes them some of my favorite to use in the preschool classroom.


Press Here is full of directional language and really plays on children's curiosity as they watch the magic unfold on each page. Here's an example from the first few pages of the book:


Press the dot on the first page, and two appear on the next! Children are excited and amazed by what they can "cause" the book to do as they read. (And believe me, it only gets better!)

Press Here also incorporates red, yellow, and blue (the primary colors), along with black and white, which made it the perfect tie-in for our colors/color mixing theme. After we finished reading, we made tissue paper dot collages using different sized circles.


We used paintbrushes to cover a sheet of white tagboard with a mixture of glue and water, then (gently) placed the tissue paper circles onto the sticky surface.

This was a process-based activity, meaning there was no specific end-goal in mind or "right way" to complete the project. The idea was to allow children to explore the materials with minimal teacher input as to what they were "supposed" to make. A few learned very quickly that rubbing the tissue paper would cause it to tear, and that too much glue would cause wrinkles. These kinds of discoveries are so much more meaningful when children figure them out for themselves, in their own time.

Pulling individual circles from a stack was also great for developing fine motor skills.


Our collages are dry but still need to be hung; we'll update you on the results once that's done. Have a great night!


Thought of the Day


Image from melissasweet.net

“Children need the freedom and time to play.  Play is not a luxury.  Play is a necessity." 

Kay Redfield Jamison

Sunday, April 8, 2012

Our New Light Box

Ever since seeing DIY light boxes pop up on various teacher blogs, we've wanted one for our classroom. Over spring break, Mrs. Emy finally managed to make one. Here's how she did it.


You will need:

-a large, low plastic tub
-mylar (or similar material) to line the tub
-freezer or baking paper 
-double-stick tape, glue, or another adhesive
-scissors
-battery-operated lights, plus batteries to go in them

Purchasing information: The plastic tub here is from IKEA. I found a large mylar-coated foam lawn mat at Daiso, though the reflective shields for car windows (available at Lulu's or Carrefour) would work, too. The battery-operated push lights are also from Daiso.

You don't need to be super precise. The main thing is to make sure there are no gaps along the bottom or sides so that the light won't escape. (I cut a large rectangle for the bottom, then cut separate panels with plenty of overlap for the sides.) Attach with double-stick tape as you go.

Here's what my tub looks like fully-lined with the mylar. As you can see, no perfectionism present :) I tucked the overhang from my side panels under the lip of the bin and used more double-stick tape to hold it in place.

Place your push lights inside the lined tub.

Cut a piece of baking or freezer paper to cover the top of your tub. This will help mute and disperse the light. Again, it needn't be precise.

Push your lamps on when you're ready to use the light box. Obviously, you'll need to move the paper for this step :) Place it back on, secure the lid, and you're almost done!

This, of course, is optional, but salt writing is a really fun way to explore the light box. Since it's also the first activity I wanted to try with the kids, I decided to test it out at home.

I brought the completed light box to school today as a sort of "Welcome Back" gift for the children. I'm happy to report that they loved it!

I mean, look at that smile!

Trails in the salt

Someone discovered the colored plexiglass viewers I'd placed in our new "Science Lab" role play corner, adding a whole new element of creative play.


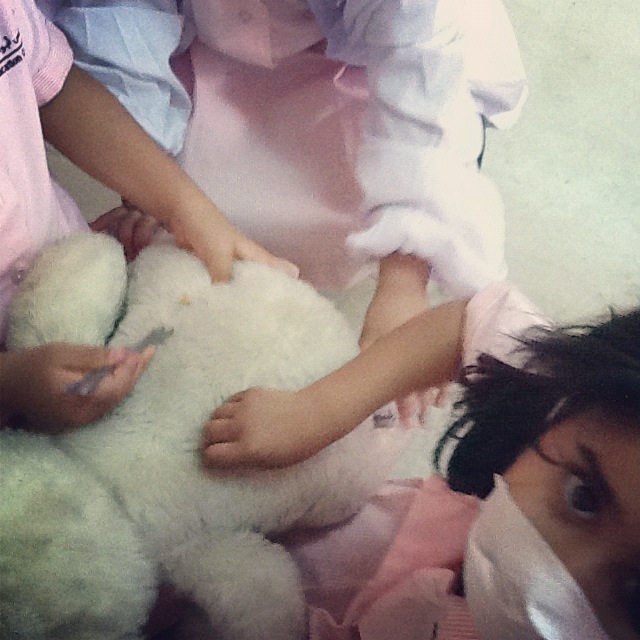
I will never grow tired of little hands at work. 

This was an easy and inexpensive enough project that we're thinking of making a few more boxes. It would also be a great item to have at home to encourage creative, open-ended play.

--

PARENT CORNER

Why salt writing?

Salt writing is a great sensory activity for young children. Pre-schoolers and toddlers especially learn through the use of their five senses, and salt-writing on the light box stimulates little eyes, hands, and minds. Using fingers to draw helps prepare hands for writing and allows children to practice making letters and marks in a pressure-free way. Writing with a finger is generally less frustrating to a child that may not yet be comfortable holding a crayon, pencil, or other writing utensil.

If you're interested in learning more about sensory play, these articles are a good place to start:

"A Handful of Fun" by Amanda Morgan at NotJustCute

"Sensory Play. . ." by Emily Harmon